Hot x Babka


DSC_0173

I should start by saying that this recipe is an adaption of an adaption; the original babka recipe is by Honey & Co but I made a few alterations to this recipe by David Lebovitz. Essentially the babka dough is the same and I’ve just altered the filling to make it Good Friday friendly.

If you want this ready for tomorrow morning you need to start this evening to allow the dough time to rest overnight. It might sound long-winded but its actually very easy and I would suggest you follow David’s method and step by step photo guide while simply switching his filling for mine.

Filling method

Melt the butter together with the sugar, spices and fruit; you want the sugar to have melted and the mixture to be thick and sticky.

When you’ve made the filling, you will need to ensure it is cool before using otherwise it will be too liquid!

Babka Dough

2 teaspoons / 20g active dry yeast
100ml milk, slightly warmed
1 teaspoon caster sugar
90g unsalted butter, room temp and cubed
1 large egg
¼ teaspoon salt
280g strong white flour

Hot x filling

100g unsalted butter
150g caster sugar
50g sultanas
50g candied peel
25g currants
1½ teaspoons ground cinnamon
½ teaspoon ground ginger
1 apple, peeled, cored and grated
Zest 1 clementine or half an orange

Syrup 

100g sugar
125ml water
1 tablespoon honey

NB It is worth noting that I didn’t use all the syrup, maybe only half.

Banana and Peanut Butter Loaf

DSC_0134

I love a wholesome cake recipe which still tastes like a cake should: sweet, gooey and moreish; which is exactly what this banana and peanut butter loaf is. The recipe uses wholemeal flour and you could cut the sugar entirely, using only the bananas for sweetness.

While it’s true that peanut butter is high in fat, it is also important to remember that it does have health benefits. For this recipe I opted for a smooth version with no added sugar or salt which also uses palm oil from sustainable sources.

Strangely (and probably contentiously) I’m not a fan of peanut butter on toast but I have come to love cooking with it (I’m looking at you white chocolate peanut butter blondies).

Ingredients

125g wholemeal self-raising flour

1/2 tsp baking powder

1 tsp ground cinnamon

A generous pinch of Maldon salt

50g butter, melted

1 tbsp smooth peanut butter

30g dark brown soft sugar

1 tsp vanilla essence

1 egg

1 tbsp milk

4 ripe bananas


Method

Preheat the oven to 180°C/ 160°C fan and grease and line a loaf tin with baking parchment.

Weigh the dry ingredients, place in a bowl together and mix.

In a bowl mash 3 of the bananas with the peanut butter, add the sugar, egg and vanilla essence and finally the melted butter; once combined, add this mixture to the flour, cinnamon and baking powder.

Fold gently and mix well before transferring to the baking tin. Slice the final banana in half length-ways and gently press both halves into the top of the cake mixture.

Bake for 30-40 minutes until golden brown or until a skewer inserted into the cake comes out clean. Remove from the baking tin and cool on a wire rack.

This loaf is incredible served with peanut butter ice cream; not easy to find but the wonderful people at I’m Real Ice Cream make one which is at once light in texture and rich in flavour. I couldn’t recommend more!


Pear, Thyme & Hazelnut Frangipane Tart


DSC_0978

This tart is the perfect dinner party pudding and is very delicious served with a thimble full of homemade quince liqueur. The depth of flavour from the orange and thyme and the nuttiness of the hazelnuts and spelt flour are the perfect complement to the ‘salted caramel crunch’ flavour by I’m Real Ice Cream; the ice cream is wonderfully light as it is made like a gelato ie with milk rather than cream.  Make sure to roll the pastry nice and thin so it has a good crumbly crunch!

Ingredients

Pastry
125g plain flour
100g white spelt flour
120g unsalted butter, chilled and cut into cubes
1 tbsp golden caster sugar
1 egg yolk

Frangipane Filling
150g butter, softened
150g golden caster sugar
160g whole hazelnuts, blanched, (roasted) and finely ground
45g plain flour
1 tsp baking powder
1 egg plus 2 egg yolks
1 medium orange, zested
2 small sprigs thyme
3-4 ripe pears

DSC_0950


Method

Preheat the oven to 180˚C and place a large flat baking sheet in the oven to heat up.

This second stage is optional but I like to toast my hazelnuts for a greater depth of flavour; keep an eye on them but they should take around 6 minutes in a hot oven. Remove, allow to cool and blend to a fine powder.

Starting with the pastry, add the flours, butter and a pinch of salt to a food processor. Once the mixture resembles breadcrumbs add the sugar and egg yolk. Pulse again and the mixture will start to come together; at this point if the pastry is still crumbly, add a tablespoon of cold water. Bring the dough together with your hands, adding a scant amount of cold water if needed and then shape into a ball, wrap in clingfilm (or a beeswax wrap if you have one) and chill in the fridge for 30 minutes.

On a lightly floured surface, roll the pastry to fit a 24cm tart tin that’s about 3.5cm deep. Trim the excess and pinch the edges of the pastry for a clean finish. Prick the base, then line with baking parchment and baking beans; bake for 6 minutes on the hot baking sheet. Remove the paper and beans and bake for 8 minutes, until the base is just starting to colour. Remove from the oven and turn down to 170˚C

For the filling, beat the butter and sugar until light and creamy, then add the eggs, hazelnuts, flour, baking powder, thyme leaves (de-stemmed) and orange zest.

Peel the pears, core and cut into quarters before slicing vertically through each one at half centimetre intervals; if you wish to fan the segments, ensure you don’t slice all the way leaving the segments attached at the top.

Spread the hazelnut mixture into the pastry case and press the pears into this, fanning them a little.

Bake for 25-30 minutes or until the filling is puffed and golden. Brush the pears with warm apricot jam and leave to cool until just warm.

Decorate the tart with sprigs of thyme and serve with scoops of I’m Real Ice Cream ‘Salted Caramel Crunch’

Chocolate, Olive Oil & Lavender Cake

THE LONDON PANTRY 6 (2)

I developed this recipe for Olive Branch a few weeks ago when Britain was basking in a summer heatwave. Baking a chocolate cake in 30ºC heat was a questionable life decision but the lavender plants were spilling out of their pots heavy with flowers and I couldn’t resist! One of my all time favourites for afternoon tea is my recipe for lavender shortbread; I love how the surprisingly savoury notes of the lavender balance the sweetness of the shortbread and I wanted to capture the essence of this in a chocolate cake.

THE LONDON PANTRY 1

The peppery notes of the aromatic cold pressed olive oil perfectly complement the lavender and both work beautifully with the chocolate. This is one of those recipes which has the power to whisk you away; one mouthful and my thoughts turn to Provence where the heady scent of lavender fills the sun-baked air and to dinner beneath plane trees, where soft linens meet with breezy candle. A table laden with Charentais melon, artichokes and Pineau.

DSC_0495

Ingredients

10 heads flowering lavender

6 free-range large eggs

240g caster sugar

200g dark chocolate (70%)

150ml olive oil

50g ground almonds

pinch sea salt

Method

Pre-heat the oven to 170 and grease a 23cm springform tin with butter (or oil if you would prefer to keep the recipe vegan but note this might result in a cake with slightly crunchier edges)

 
Place a bowl over a pan of simmering water, ensuring the base doesn’t touch the water. Add the chocolate to the bowl and allow to melt before adding the olive oil and lavender heads (its important that the lavender is flowering or freshly picked otherwise you will end up with bits in the cake). Remove from the heat and allow to cool.

 
In a very clean bowl, whisk the egg whites on a high speed and after 1 minute add 150g of the sugar. Continue whisking until you have a thick and glossy mixture.

 
In a separate bowl add the egg yolks to the remaining 50g of sugar and whisk until pale and doubled in volume.

 
Remove the lavender from the cooled chocolate mixture (if necessary, stand the bowl containing the chocolate in a basin of cold water; it should be no more than hand hot) and add to the egg yolks, along with the almonds and salt, folding to mix.

 
Take a spoonful of the egg white mixture and add it to the chocolate to loosen. Carefully fold in the remaining egg white using a metal spoon and turn the mixture into the springform tin.

 
Bake for 35 minutes until springy to touch or an inserted skewer comes out clean. Allow to cool and dust with icing sugar and sprinkle with lavender flowers before serving with crème fraiche.

THE LONDON PANTRY 7

 THE LONDON PANTRY 5 (2)

Stirring Slowly

LD Edit.jpg


The wonderful Stirring Slowly had been on my list for a while, but being an inherently lazy cook, when it comes to new recipes and meal inspiration more often than not I turn to Instagram or the internet and the mecca that is jamieoliver.com. But this recipe book is a game changer.

On the day it arrived it just so happened that I had all the ingredients for roasted sticky plum chicken with pickled cucumber (I mean, when does that ever happen?). A perfect late summer dish when the plums are still sweet and the cucumbers British. One recipe in and I was already consumed, thumbing pages and trotting off to the greengrocer for ingredients.

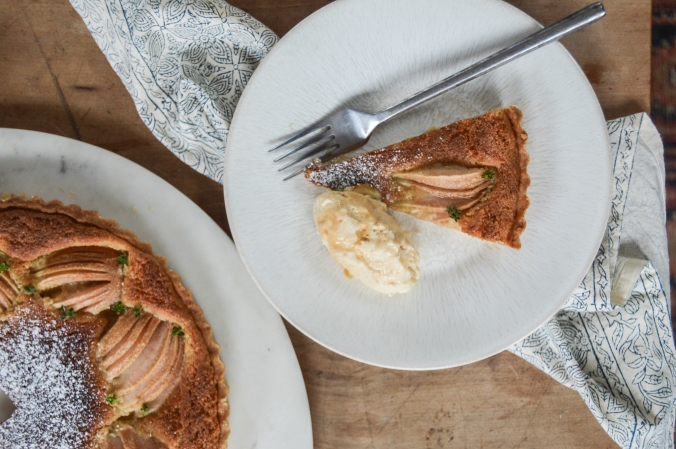
As it happens, when you have a young baby, lots of people want to come and visit. Which means cake. Lots of tea and cake. Funnily, one of my main reasons for buying the book was Georgie’s blondie recipe; I’ve heard great things but am still yet to make it. When you have recipes for malted milk chocolate and raspberry tart and pumpkin and ginger layer cake it is easy to become distracted. Whole afternoons disappeared while my four-month old baby slept; I probably should have been doing the washing, tidying the house or looking around nurseries. Instead I baked.

As I sit writing, perched on the table next to me is a still-warm-from-the-oven fennel and sausage muffin from Stirring Slowly. It’s a moody autumn day outside and the kitchen is filled with the warming aroma of fennel; it’s a herb I’ve come to love and a spice I don’t use enough. I’ve included the recipe below, not because it’s my favourite but because it’s comforting and versatile: breakfast, snack or paired with a lunchtime bowl of soup.

So I’m slowly working my way through what Jamie Oliver calls a ‘new modern classic’; Georgie’s total understanding of flavours makes for dishes which I will go back to time and time again; each recipe is balanced and restorative and although she does not proclaim herself to be overly health conscious (I’m looking at you banana loaf with peanut butter frosting), there is a wholesome quality to her cooking and in the blend of ingredients, both of which are influenced by her Greek-Cypriot heritage.

I urge you to get yourself a copy immediately so you have enough time to work your way through it before Georgie publishes her next book! Also have a look at her blog; Georgie is more than an accomplished cook, she is a wonderful writer. She is also a mother who has suffered tragic loss and her story is inspiring and heartwarming.

Next up, the Jerusalem artichoke and thyme barley risotto.


Fennel & Sausage Muffins

Ingredients

1 garlic clove

1 tsp fennel seeds

200g good-quality sausages, Italian if possible

1/2 tsp dried chilli flakes

150ml olive oil

1/2 bunch spring onions

350g plain flour

1.5 tbsp baking powder

sea salt & freshly ground black pepper

2 large eggs

275ml full-fat milk

135ml buttermilk

200g mature cheddar

a few sprigs flat-leaf parsley


Preheat oven to 180°C/GM4 and line a muffin tray with cases


Peel and finely chop garlic, grind fennel seeds in a mortar and pestle and place a large non-stick frying pan on a medium-high heat. Squeeze the sausage meat out of the skins and place in the pan with the garlic, chilli flakes, fennel seeds and a glug of olive oil. Break up with a wooden spoon and fry until crisp and golden. Spoon the sausage meat on to a plate and leave to one side to cool.


Trim and finely slice the spring onions. Place most of them in a large bowl with the flour, baking powder and seasoning. In a jug whisk together the eggs, olive oil, milk and buttermilk.


Add most of the cooked and cooled sausage to the flour (reserving the rest to sprinkle on top of the muffins). Make a well in the middle and pour in the wet ingredients, then finely chop the parsley, add to the bowl and gently fold everything together. Do not over-mix or your muffins will be tough! A few lumps are ok.


Divide the batter between the cases and top with the remaining spring onions and sausage and grate over the remaining cheese. Bake the muffins for 18-20 minutes, until golden brown and cooked through. Leave them in the tray for 5 minutes before transferring to a rack to cool.


Rhubarb and Custard Cake

On the way out of London yesterday afternoon, we took a small detour via Richmond and popped into the teahouse at Petersham Nurseries for a cup of tea and slice of cake. The last time I went to Petersham Nurseries, I spent weeks after trying to recreate Skye Gyngell’s pear, almond and chocolate cake; eventually I cracked it and oh was it worth it!

P1010212

Syke Gyngell’s has since moved onto pastures new at Spring, Somerset House and the teahouse at Petersham along with the restaurant is now under the watchful eye of Damian Clisby, former head chef of HIX, Soho.

P1010199

The charm of Petersham Nurseries is being able to sit in a greenhouse mid winter with your afternoon tea and feel that it’s completely normal to do so. The long and beautiful greenhouses home higgledy piggledy wrought iron chairs and tables, jasmine branches cling to everything and you feel that you feel that you are somewhere a world away from England. The delicate and zesty scent of paper whites and hyacinths fill the air and although its cold and crisp outside, the greenhouse is remarkably cosy.

P1010282

Before we find our way our way towards the ramshackle teahouse we wander around the nursery. Gael and Francesco Boglione bought Peterhsam House in the late 90s and by 2004 had completed renovated the nurseries; their talent lies in “drawing out beauty in the simplest of things”.

P1010219

P1010221

P1010236

We queue in the kitchens with a tray and take our pick from the table of cakes; while the flourless chocolate and almond cake grabs my eye, like a child in a sweet shop, I can’t resist the rhubarb and custard cake. It looks gooey and is tinged with pink. Armed with jasmine tea and hot chocolate we find a table amid the afternoon rush. The cake is gone within seconds; I vow to recreate it at home.

P1010271

P1010201

Fortunately, my mother bought some rhubarb at the market that morning and has spare. It’s Dutch but British rhubarb is just coming into season and the forced stems are delicate and jewel pink.

I used Afternoon Tease’s recipe with some minor adjustments; it needs to cook for at least 1 hour 30 minutes and although it’s not complicated, the process takes time as there are 3 stages to cooking the cake. I made my own custard but you can use ready-made however make sure it is thick enough in consistency; if necessary warm the custard with a little conflour.

P1010321

I also made made some candied rhubarb for decoration; simply place equal parts sugar and water in a pan – half a cup will suffice – bring to the boil and cook until the sugar has dissolved. Using a vegetable peeler, slice thin lengths of rhubarb and place into the sugar syrup, remove then place flat on a baking tray, ensuring they do not touch. Cook at 180 until the rhubarb has dried out; you will need to keep an eye on the oven as it can turn very quickly. Once dried, remove from the oven and while it is cooling, curl it into shapes to use as garnishes on cakes and cocktails.

P1010306

P1010327

P1010333

P1010348

If like me you have a thing for rhubarb or a glut then I suggest you have a look at these!

Orange Blossom and Pistachio Madeleines

P1010103

When I was last at home before New Year, I spent a morning in the village antiques barn with my mother and sister. We all have the same beady magpie eyes: me particularly for all things copper and kitchen related, Mum for silver teaspoons (she could feed the 5000 such is the extent of her beautiful collection) and my sister for glassware and bone handled knives.

P1010072

During my rummaging I found some beautiful vintage baking trays that caught my eye; happily Mum has some similar at home so I bundled them back to London with me, full of ideas on how to fill them. Ultimately, there was only one thing destined for this beautifully scalloped tray; buttery French cakes!

P1010069

There are many different ways to make madeleines. This recipe splits the eggs; the yolks are combined with the butter and the whites are whisked which gives rise to the characteristic, well, rise! You can keep the cake classic with a dash of vanilla or experiment with flavours; raspberry and rosewater is next on my list.

P1010095

Method

1. Heat oven to 190C/170C fan/gas 5.

2.  Melt you butter in a pan; I add a little extra so I can grease the baking tray – using hard butter won’t allow you to grease the grooves of the tray. If you are feeling brave, browning the butter will add a nutty flavour to the madeleines; however take care not to burn the butter as it will turn very quickly.

3. Some recipes suggest chilling your trays prior to cooking; similarly with the dough. Apparently chilling prior to cooking will encourage the classic madeleine bump to form.

4. While the butter is melting, finely chop the pistachios using a blender; combine with the flour and sugar in a large bowl

5. Break and separate the eggs. Place the egg whites in a bowl and whisk to form soft peaks. Combine the one egg yolk with the slightly cooled butter and orange blossom water and mix well using a fork.

6. Add the butter mixture to the dry ingredients then fold in the egg whites. Take care not to over-stir the egg whites as you will lose the air; a metal spoon is better for this than a wooden spoon.

7. Add a spoonful of the mixture to your prepared tins; you want them to be two thirds full. Place the tins in the pre-heated oven for 10 minutes. Remove from the over and place on a wire rack to cool before dusting with icing sugar.

8. The mixture makes enough for 20 so depending on the size of your tray you might need to repeat.

Ingredients

  • 100g butter, melted, plus extra for greasing
  • 85g plain flour, plus extra for dusting
  • 50g pistachios
  • 1 tsp orange blossom water
  • 100g golden caster sugar
  • 1 whole egg separated, plus 1 egg white
  • Icing sugar, for dusting

P1010079

P1010091